The Best Giant Chocolate Chip Cookie & A Birthday

It’s Monday again. We all know I hate Mondays. You want to know something that can make any day just a little bit better? A giant cookie.

Too bad I already ate this one, otherwise I would have something right now to help solve my Monday morning afternoon blues. But it’s okay, because I know you’re going to make one and you’re going to eat it and it’s going to make your Monday or Wednesday just a little bit brighter, sweeter and just totally delicious. Trust me, cookies and milk solve all problems. Except perhaps the not being able to fit into pants problems.

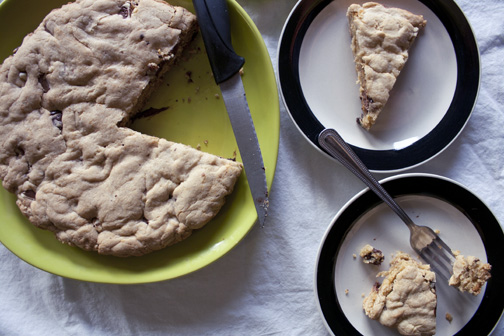
I’d like you to meet the boyfriend’s Valentine’s present. You can’t beat edible presents of Valentines day, especially when they’re homemade. Everyone gets a box of chocolates or a dozen chocolate roses but how many people received giant, homemade, love-filled chocolate chip cookies? Yeah, I didn’t think there were many.

And okay, maybe a giant cookie was the lazy way out of making an entire batch of cookies but you what? It was freaking delicious and with all the cookie dough in the oven at one time, I was less tempted to eat massive amounts of cookie dough while waiting for a batch to bake; so I’d say this is a win-win situation. This is the perfect dessert for birthdays and any other celebrations; plus it’s so incredibly easy.

On a side note, yesterday was my wonderful Mom’s birthday. Unfortunately, I was unable to see her on her special day. If I had, I definitely would have made her a special birthday treat; maybe not a giant cookie…but there definitely would have been a cake to sing and blow out candles with.

Mom, this is for you; a virtual birthday cake of some sort. I love you so much and I miss you and everyone at home more everyday. I hope you know that every time I’m baking or cooking in my kitchen that I’m always thinking of you or Dad, trying to remember how you made things, what your cookies tasted like and if mine match up to yours. I’m sorry I was not there for your special day but I just wanted to thank you for all that you have taught me both in life and in the kitchen because certainly I would not be able to do any of this without you. Happy Birthday!
The Best Giant Chocolate Chip Cookie
(Makes one really big cookie)

3/4 stick of butter, softened
1 c. light brown sugar
2 tbsp. sugar
1 egg
2 tsp vanilla extract
3 tbsp. unsweetened applesauce
1/2 tsp. baking powder
1/2 tsp. baking soda
1 1/2 c. flour
1 c. chocolate chips (any kind)
Wax or parchment paper

Preheat your oven to 300 degrees. In a bowl, mix together the butter and sugars until creamy. Beat or mix in the egg and vanilla. Sift together all the dry ingredients (flour, baking powder and baking soda) and gradually add them to the butter mixture. The mixture will be sort of dry and crumbly, add the applesauce a tablespoon at a time and using a wooden spoon or your hand, mix the cookie dough together until combined. Add chocolate chips.

Cut out a round circle of either parchment or wax paper and place at the bottom of a round cake pan to stop the cookie from sticking. Spoon the cookie dough into the pan and gently press down to spread it out. Bake for about 25-35 minutes until cooked through and the edges are golden brown. Let cool for a few minutes in the cake pan before removing it. To remove, place a plate upside down on the cake pan and flip over, then repeat with another plate to get the cookie face up. Serve with ice cream.

Feel free to just take bites out of the cookie, only weirdos cut it into slices and eat them with forks. Cookies are meant to be eaten with hands.

Tapioca Pudding

I have a funny story to tell you about this tapioca.

I’ve made tapioca hundreds of times before and by made, I mean I sat in the kitchen and stirred it for my mom for hours. This is the first time I’ve truly made it by myself from start to finish. I guess I was feeling quite ambitious and decided that I would also make rice pudding at the same time (a recipe that I will be sharing with you later, not to worry).

Before you start imagining some sort of kitchen disaster where everything blows up and my poor mother comes home to find our kitchen covered into partially cooked puddings, I’m happy to say that both turned out splendidly. Albeit, I wouldn’t recommend anyone trying it out for themselves; the kitchen became incredibly hot from having both puddings on the stove (it also didn’t help that I was also roasting a spaghetti squash in the oven).

Anyway, back to the funny story about this tapioca. I had went out running early in the morning and decided that I would make the tapioca and rice pudding before showering. I put on my little sisters extremely vibrant and ruffled apron and started cooking away. I had music blaring, the back door was open letting in the lovely sunlight and I was standing at the stove, two spoons in each hand, stirring the pots simultaneously.

Honestly, I probably could not have looked more of a mess if I tried. I was singing along to something embarrassing, probably the Spice Girls Pandora station, when I turned my head towards the back door, still stirring both pots, only to make eye contact with our mailman. I’m not lying when both of us just stared at each other for a good five seconds in complete disbelief; I was in disbelief as to why he was still there and well, I think we all know why he was confused. Luckily, he awkwardly stumbled away to the next house soon after and I continued to stir away as if I wasn’t just completely embarrassed.

Tapioca Pudding

1/3 c. tapioca balls
1/2 c. sugar
1 tbsp. cornstarch
2 egg yolks (save the egg whites and put to the side)
Quart of milk
1 tsp. vanilla

Stir ingredients in a double boiler, over heat until thick and tapioca balls are translucent for least 30 minutes stirring constantly. When thick, transfer to large bowl. Take the egg whites and beat them until white and fluffy; fold into pudding. Let cool.

It was worth the embarrassment, though.


Lemon Meringue Pie

If I could have anything for Valentine’s Day, it would be this.

Forget chocolate and leave behind anything red velvet, this is what I want for every holiday, birthday and all those days in between. Meet my most favorite dessert, my deepest desire and the one thing I would choose over peanut butter every single time; lemon meringue pie.

When I was younger, I loved reading Amelia Bedelia books. The books were fun for a little kid and at the end of each book, Amelia always made a lemon meringue pie in apology for whatever mess she made. I remember asking my mom what lemon meringue pie was and she told me she’d make me one. That was the beginning of our love affair.

Since then I don’t think I’ve celebrated a birthday without one; I’d choose pie over cake any day of the week. This was my first time attempting to make a pie and I was surprised about how easy it was. If you want to make your Valentine happy, then I suggest you make this. Put down the red food coloring, everyone has red velvet cakes, and change things up a bit.

Unfortunately, my Valentine does not like lemon meringue pie so my Valentine’s Day will be definitely lacking in that department. He did, however, surprise me with some beautiful flowers and we intend to devour large amounts of frozen yogurt later. It might not be the same as lemon meringue pie but frozen yogurt is almost as good (especially when I can load up with tons of toppings).

While frozen yogurt may suffice for this holiday, my Valentine better be aware that there will be no substitution for lemon meringue pie on my birthday. Don’t worry, I’m just kidding.

Lemon Meringue Pie

1 pie crust (store-bought or homemade, recipe below)
3 tbsp. cornstarch
1 c. sugar
2 tbsp. flour
Rind of 1 lemon, grated
2 c. boiling water
3 egg yolks
6 tbsp. lemon juice
1 tbsp. butter

Meringue:
3 egg whites
3/4 tsp. baking powder
6 tbsp. sugar
1/2 tsp. lemon juice or vanilla

Pie Crust:
1 c. flour
1/3 c. crisco plus 1 tbsp
1/4 tsp. salt
2-3 tbsp. of water

For the pie crust, mix dry ingredients until crumbly. Then add water one tablespoon at a time until a ball of dough is formed. On a floured surface, roll the dough out and place on top of a pie plate. Using your fingers, press the dough into the pie plate and pinch around the edges for the crust; remove any excess pieces. Using a fork, pierce all sides and bottom of the pie crust, creating small holes. Bake the crust at 400 degrees for about 8 minutes or until golden brown.

For the pie: In a microwave safe bowl, mix together half the sugar with the cornstarch, flour, salt, lemon rind and water, stirring constantly. Microwave 1-2 minutes at a time, stirring until the mixture is thick and clear. In another bowl, mix the remaining sugar with lemon juice and egg yolks; beat. Add this to the clear mixture and cook in microwave for another 2 minutes until thick and smooth; then add the butter. Pour this mixture into the pie crust.

For the meringue: In a mixing bowl, add baking powder to egg whites and beat until stiff. Gradually add sugar and lemon juice/vanilla; continue beating until it forms stiff peaks. Place the meringue on top of the pie and bake at 325 degrees for about 15 minutes or until the meringue gets golden brown.


I hope everyone’s having a great Valentine’s Day! What’s your favorite Valentine’s treat?


Maple Peanut Butter Swirled Brownies

I just had the best weekend of my life.

It was a weekend full of laughter, cookies, frozen yogurt and some serious kitchen failures. My beautiful cousin, Kelsey, came to visit me this weekend; this girl is my better half. It’s hard to believe that we grew up practically despising each other for the first five or so years of our lives. We go together like chocolate and peanut butter.

She shared an amazing veggie burger recipe over the weekend and I cannot wait to share that with you because I could eat it all day long; it’s that good. This weekend was also the first time I tried to make frosting. We made some awesome chocolate cut-out cookies and wanted to decorate them; unfortunately, the frosting was just short of a disaster. I won’t even tell you everything we tried to do to get it to work because we were probably so off.

Next time, though, we’re going to make it work. Although I failed at my first attempt at making frosting, I was much luckier with my first attempt at making brownies from scratch. I’ve always baked boxed brownies because they are so convenient and taste pretty good. However, I had been dying to try to make my own and I finally did! The result was better than I could have hoped for; a super moist, fudgy brownie. I’ll definitely be sticking with this recipe from now one.

These brownies contain my most favorite ingredient/food ever; peanut butter. Not just any peanut butter, though. I used Peanut Butter & Co’s Mighty Maple Peanut Butter to give the brownies a hint of maple flavor. I’m constantly debating over which of their flavors is my favorite. My top three are definitely Cinnamon Raisin Swirl, The Bee’s Knees and Mighty Maple. If you ever find any of PB&Co’s peanut butter in your grocery store, you should really pick up a jar or two. They may be a bit pricier than other peanut butters but trust me, they are delicious and I am forever addicted.

Maple Peanut Butter Swirled Brownies
(Brownie recipe adapted from AllRecipes.com)

1/2 c. oil
3/4 c. sugar
1 tsp. vanilla
2 eggs
1/2 c. flour
1/3 c. cocoa powder
1/4 tsp. baking powder
1/4 tsp. salt
2/3 c. Mighty Maple peanut butter, melted (you can
also use regular/crunchy/etc)

Preheat oven to 350 degrees. In a bowl, mix together the oil, sugar and vanilla; beat in eggs. Add dry ingredients and mix well. Pour the batter into a greased baking pan. Melt the peanut butter in a separate bowl by microwaving for 45 seconds at a time until melted. Drizzle the peanut butter on top of the brownie batter (try to do this in vertical lines up and down the pan). Using a toothpick, swirl the peanut butter throughout the surface of the batter to create a marble effect. Bake for 20-25 minutes.

Sadly, I’m out of Mighty Maple peanut butter now. Not because of these brownies but because I can’t stop eating it by the spoonful out of the jar. It belongs on these brownies though.

Toasted Coconut & Walnut Oatmeal Cookies with Chocolate Drizzle

I literally just made these yesterday and I’m dying to share.

I love all things about this cookie. It’s sweet, it has a little crunch to it and it’s just so packed with flavor.

I’ll admit that I wasn’t too sure how they were going to turn out but I ate three right out of the oven. The roof of my mouth hates me right now but it was worth it. You can’t beat cookies straight from the oven.

The dough was probably my favorite part. I’m sure this recipe could make about four dozen cookies…I only got about three but then again, I did eat my weight in cookie dough. The calories don’t really count until it’s in cookie form, right?

What’s really great about these cookies is that you can totally adjust the recipe to your liking. If you’re a huge coconut fan, go ahead, add an extra handful or two. Not feeling the chocolate drizzle or it’s too much of a hassle? Totally cool. They taste just as great without it, trust me, I did ample sampling. Although there is definitely something beautiful about that chocolate drizzle on top.

Especially when you’re the one doing the drizzling (or being the drizzler) because you get to melt all that wonderful chocolate and secretly hope there’s going to be extra so you can lick the bowl, spoon, bag etc. Also, feel free to use any type of chocolate. I only had semi-sweet mini chocolate morsels but I’m positive that dark chocolate would be absolutely gorgeous drizzled on top. White chocolate would be great as well, I’ll keep that in mind for next time.

Toasted Coconut & Walnut Oatmeal Cookies with Chocolate Drizzle
Makes 3-4 dozen cookies

1/2 c. butter (1 stick), softened
3/4 c. brown sugar, packed
1/2 c. sugar
2 eggs
1 tsp. vanilla
1 1/2 c. flour
1 tsp. baking soda
1 c. coconut (I used the sweetened kind by Baker’s)
1 c. oatmeal
1/2 c. walnuts, finely chopped (optional)
1 c. chocolate chips or chocolate bar, any kind

Preheat oven to 350 degrees. {This is optional: On a greased cookie or baking sheet, spread coconut and walnuts on the sheet and toast them for 5 – 10 minutes. Be careful not to burn the coconut. Allow to cool before adding to batter}

In a large bowl, beat butter and sugars together until creamy. Then add the eggs and vanilla; mix well. Mix in the flour, oatmeal and baking soda. Add coconut and walnuts;
mix well.

You can either drop the dough by the spoonfuls onto an ungreased cookie sheet and bake for 8 – 10 minutes or chill the dough for about thirty minutes, then rolling the dough into a loose ball and dipping the top into coconut for extra flavor, then also baking 8 – 10 minutes. It’s up to you, they both taste equally fantastic; I did half and half.

Melt chocolate in the microwave for 1 – 2 minutes and spoon into a small ziploc bag. Make a very small cut in the corner of the bag; drizzle chocolate over cookie. Allow chocolate to cool completely before storing cookies in a jar or tin.

With all this coconut talk, I really want a piƱa colada.

Peanut Butter Tandy Cakes

Wanna know a secret?

I could probably live solely on peanut butter…

And maybe some butterscotch krimpets. When I first moved onto campus as a freshmen, my grandmother would send me boxes and boxes of butterscotch krimpets. Now that I think about it, I probably haven’t eaten a Tastykake butterscotch krimpet since then.

Enough about the krimpets, though, they couldn’t hold a candle to Tastykakes peanut butter kandy kakes. It was always a good day when my mom would put those babies into my school lunch. A close second definitely being oatmeal cream pies (because who doesn’t love Honey, I Shrunk the Kids?).

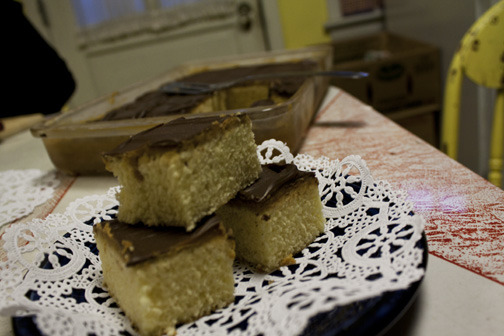
I made these right after new years. I’m sure my family was so glad I sabotaged helped out with their new years resolutions while I was on winter break. I mean, my resolution was becoming more comfortable in the kitchen; and these tandy cakes? I think it requires more effort to not eat them than to actually make them because they are literally so easy.

I remember so many birthdays and parties that these little cakes made an appearance and I’ve never witnessed anyone not liking them. But, then again, it’s almost impossible to not love chocolate and peanut butter.

Peanut Butter Tandy Cakes
Makes about 24+ servings, depending how you cut them

4 eggs, beaten
1 c. milk
2 tbsp. oil
1 tsp. vanilla
2 c. flour
1 tsp. baking powder
2 c. sugar
1/8 tsp. salt
———————–
1 c. peanut butter
8 oz (or 6 pack) Hershey bars

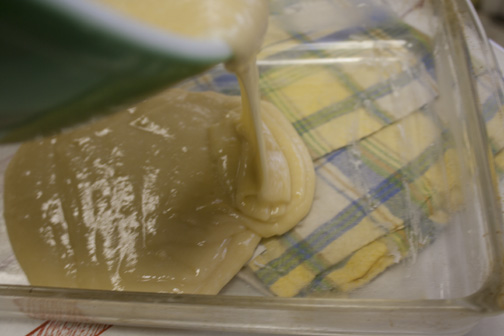
Preheat oven to 350 degrees and grease a 10 x 15 dish with butter or Pam. Combine the eggs, milk, oil and vanilla in a bowl, mix well. In another bowl, sift flour, baking powder, sugar and salt. Pour the flour mixture into the egg/milk mixture and mix until blended. Pour into greased pan and bake for 15-20 minutes, until golden brown.

When cake is taken out of the oven, drop the peanut butter onto the cake while hot. Spread evenly as peanut butter melts. Freeze for about 30-45 min. Melt the chocolate in the microwave or in a double broiler and spread evenly over the cake. Cut it into squares and refrigerate until serving.

I dare you just eat one.